Sanitizing YouTube Transcripts the Trendy Way: with AI Agents!

Introduction 👋🏾
Do you ever worry that the machines are close to taking over from us humans? Look no further than YouTube’s machine-generated closed captions for peace of mind.

That screenshot 👆🏾 is from a video uploaded in 2011. A decade and a half later, I still found it necessary to build a tool that makes sense of the closed captions in some videos I watch. Luckily for us, YouTube’s parent company brought the gift of LLMs to the world. Let’s go through my LLM-infused attempt at improving those gnarly transcriptions.
The AI Stack ⚙️
LangGraph
LangGraph is a framework for building the latest and greatest agentic workflows, making it a natural choice here of course. At a basic level, LangGraph represents an AI agent as a graph network where nodes perform actions and edges (the connections between nodes) dictate which nodes get executed in what order. A simple example is an agent with one node and two edges that connect the single node to the start and end of the graph, as seen below:
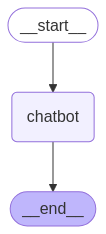
The chatbot node can be any function, whether or not it uses an LLM within. So it’s actually perfectly fine to build a LangGraph workflow that doesn’t use LLMs directly. For instance, a dev team may happily use LangGraph to orchestrate parts of their application knowing they’ll eventually spice things up with AI ✨.
State is another important concept to keep in mind. The state object is exactly what it sounds like: a place to preserve any data that’s relevant to the behavior of the agent. What’s the quote again… “with great freedom to save anything to state comes great responsibility to manage state updates wisely” 🤔 💭… or something like that anyways. LangGraph uses the reducer pattern for state management, so nodes can independently update specific parts of agent state without touching other parts. If you are familiar with state management in popular frontend frameworks, you probably already understand how this system works.
LangChain
LangGraph’s elder sibling. LangChain comes packed with lots of utilities and prebuilt functions that implement common patterns and best practices for building with LLMs. OpenAI is the model provider of choice for this writeup so I’ll be using LangChain’s OpenAI companion package, though Anthropic, Google and many others are perfectly capable alternatives too.
Tavily
The hero message on their landing page sums it up neatly: “Connect Your Agent to the Web”. Tavily provides a highly configurable suite of tools for getting structured results from the web. As we will see shortly, web search is a critical part of this agent’s internal operations.
The Agent 🤖
To keep things manageable, the objective of this agent is to correct misspellings of real-world entities that show up in the transcripts. That’s because the names of such entities get butchered a lot in those transcripts, though other sentence elements are often captured accurately enough now. Restoring the honor of the butchered entities is a worthy task for this agent. This focus on names means that this agent will not try to correct “imitated Jamaican vacation dot” to “Hey man. How’s your Jamaican vacation going?” as seen in the earlier screenshot. Rather, the agent should detect that “Jamaican” refers to a real-world entity and focus only on correcting it if it’s misspelled.
Broadly speaking, the agent works in 3 steps:
Extract named entities
Find canonical references for the named entities using web search
Replace incorrect names with canonical names where appropriate
To explore each step further, let’s get a basic outline of the agent:
Nothing fancy at this stage, just placeholders for the agent and its state object.
Step 1: Extract named entities
LLMs are a great fit for this step. They have gotten pretty darn good at extracting data from raw text. Plus, they’re also very good at formatting their output according to defined structures. The output of this step needs to go into a web search query, and an ideal query will contain both the named entity and some additional context to make the web search results a lil’ bit sharper. The agent must therefore extract named entities and relevant additional context from the transcript.
To kick things off, the first node in the agent will need the transcript text and an LLM to extract the relevant data. In Code This Means (1) the AgentState needs a property for the transcript text and (2) the node function needs an LLM to perform the extraction. Updating the agent’s state schema is easy enough:
And then comes the node function:
The extractor_node function performs the extraction by passing the transcript_text piece of state into the extractor_llm. Now the node must actually go into the agent’s graph:
The extractor is the entry point of the graph, though for now it’s also the exit point because it has no other friends in the graph 🥺.

Looking back at the system prompt for the LLM, there’s no guarantee of the structure and format of the LLM’s response. That needs to change:
The prompt now stipulates that the LLM must provide the name and context for each extracted entity in JSON format. Still, even if the LLM gets the format right, it’ll return text that contains JSON. To get the desired equivalent python objects, LangChain’s with_structured_output() method will try to convert the LLM’s text response into a defined Pydantic model.
Before going further with the agent logic, it’s a good idea to test the existing code. To do that, the graph needs to be compiled into an object that can be invoked:
The agent will be triggered by invoking the graph property. LangGraph provides 2 methods for this: .invoke() and .stream(). Both of them run the agent end-to-end with the provided input. However, .invoke() runs without interruption and returns the final complete state object when the run is complete, whereas .stream() returns an iterable containing every update to the agent’s state as the agent was running. Put differently, .stream() is more appropriate when the developer wants finer-grained control over each step of the agent’s logical flow. I prefer using the asynchronous versions .ainvoke() and .astream().
So then, what input do these methods accept? The initial state of the agent! Suppose the video transcript is the following:
"Hollywood director Kristoffer Nolen has announced his next big project, rumored to be another complex sci-fi thriller. Fans of Nolen’s earlier work are eager to see if this film will rival the success of ‘Inceptshun’ or ‘Dunkrik.’"
I’ll pass it into the agent like this:
Executing the file prints the following output:
Success! The LLM extracted 3 named entities (1 director’s name and 2 movie names) from the transcript, and provided some context around them too. The “Agent response: …” line shows the final state of the agent (from using .ainvoke()), which is the same as the initial state because the extractor node didn’t update the agent’s state.
Step 2 of the agent’s workflow needs the extracted data, so the extractor node needs to save that information to the agent’s state. In LangGraph, a node updates a piece of state by returning a dictionary containing a key for that piece of state. Saving the extracted data to state is therefore as easy as returning the extracted data in a dictionary with the appropriate key.
Now invoking the agent on that same transcript yields:
extracted_entities is now present, which means Step 1 is complete! ✅
Step 2: Find canonical references for the named entities using web search
Here’s the basic idea: search the web using outputs of the extractor, then verify the canonical names from the search results using another LLM.
In steps Tavily. Using the Tavily Search module, the agent can research the entity name along with the extracted context. In Code This Means:
The research_entity function constructs a web search query by simply concatenating the entity’s name and the extracted context, and takes only the top 3 results. Now the agent needs to get the canonical name from the search results. Big wall of code incoming! ⚠️🫣
Thankfully what the code does is not actually complicated. TavilySearchResult is just a convenience type based on the response schema of Tavily’s search endpoint. get_canonical_name formats the search results into a digestible string for the verifier LLM, invokes the LLM, and returns a structured VerifiedEntity after collecting the LLM’s response. The LLM is configured to output a BaseVerifiedEntity to make the process smoother.
The 2 new functions, research_entity and get_canonical_name, will be used by the next node in the graph, but… there could be any number of NamedEntity objects coming from the extractor node. How then can the agent handle this unbounded structure?
LangGraph’s Send API to the rescue! The Send API covers scenarios in which there’s an unknown number of parallel nodes (let’s call them workers) that will flow from a given node, and allows each worker to maintain its own state while also syncing to the state of the parent agent if desired. From the perspective of DemoEnrichmentAgent, each individual worker should receive a NamedEntity, coordinate with research_entity and get_canonical_name, then return a VerifiedEntity that can be saved to the agent’s state. We’ll return to the Send API shortly. First, the logic for the worker:
get_verified_entity_worker takes the named entity from its own WorkerState, uses research_entity and get_canonical_name to verify that entity, then updates the worker state with the verified entity. As you’ve probably already noticed, the verified_entities piece of WorkerState uses a slightly unusual Annotated[list, operator.add] type. The base list type is to keep track of all the verified entities. Annotating list with operator.add tells LangGraph to merge (by appending) each new list of items to the existing list of items for that state key. Without that annotation, the verified entities will be lost because LangGraph’s default behavior is to replace the previous list of values with the incoming list of values. Definitely don’t want the verified entities getting lost 🙅🏾♂️.
Lest we forget, the worker state is still isolated from the agent’s state. Would be really nice to have the verified_entities list synced up to the agent state… which is surprisingly trivial to achieve: define the same key in the agent state and LangGraph will keep them in sync.
With the state synced up, the Send API comes back into the picture. For this the agent needs a function that will spawn a worker for each extracted entity:
The first argument passed to Send() is the name of the node that will handle the requested operation (i.e. the worker), and the second argument is the piece of state that will be passed to that node (i.e. the WorkerState). However, get_verified_entity_worker is not actually a node in the graph. Well then, it’s time to fix that!
The graph now features a conditional edge that connects extractor to any number of get_verified_entity_worker nodes, as many as created by spawn_workers. Here’s the updated graph representation:

Now I don’t know about you, but for all that code we just went through, I feel like the graph should definitely look fancier 😒 [shakes fist].
Oh well, the thought of seeing the output of the updated agent brings a smile back to my face 🙂. Quick comment on the graph representation: the dotted lines between extractor and get_verified_entity_worker signify the 1-to-many relationship between the two nodes.
And now for the test! The same video transcript from earlier will suffice. The logs for this operation are quite a bit longer than those from the previous step, so I’ve pasted them here for your viewing pleasure 😍. They show the agent going through the research steps concurrently and then ending with the final state object that contains the verified entities. Smile definitely restored 😁. On we go to Step 3! 🏃🏾♂️
Step 3: Replace incorrect names with canonical names where appropriate
There are no prizes for guessing that, once again, an LLM is a capable tool for this step. A simple deterministic "Find and Replace” operation (like a regex) may conceptually seem to do the trick here. Turns out that strategy will quickly go off the rails because there’s no guarantee that every reference to a named entity will use the exact text that the extractor produced for that entity. It’s well and good to find and replace occurrences of “Kristoffer Nolen” with “Christopher Nolan”, but that won’t catch something like “Nolen’s” where “Kristoffer” is missing, or “Kristóffer Nolen” where an accented “ó” is present. With an appropriate prompt and some examples, an LLM can be coached to handle the inevitable variability quite well.
This agent will use a modified “Find and Replace” strategy. The agent will make successive scans over the text, use an LLM to replace any incorrect references it detects for each verified entity, and review the replacement work to ensure completeness. This strategy is not at all perfect, and I will discuss avenues for optimization. More on that to come.
Right now it’s time to scaffold the strategy. For each verified entity, the agent will:
scan the transcript text and replace any occurrences with the canonical name. The agent needs a node for this.
review the output of the replacement to make sure it was complete. The agent also needs a node for this.
decide when to move on to the next verified entity. The agent needs a conditional edge for this, though with different behavior from the earlier one.
And on to the code 👨🏾💻:
get_verified_entity_worker now connects to replacement_reviewer, which compresses the unbounded structure back into one node after all the workers have completed their tasks. The new conditional edge stipulates that a return value of continue from continue_replacement_router will push the logical flow to replace_entity, whereas a return value of end will terminate the agent’s work. There’s also a normal edge connecting replace_entity to replacement_reviewer, which means that every time continue_replacement_router returns continue, a replacement will be attempted and subsequently reviewed. Voila! A decision-making loop in the agent. Now the graph looks like this:

Finally it looks more interesting! 🤓
Let’s flesh out the new functions in reverse order, starting with continue_replacement_router. This function’s behavior is relatively straightforward: if the agent has replaced all the verified entities, the task is done. Otherwise, the process should continue. A loop counter will be helpful to know which member of the verified_entities list the agent is working on.
continue_replacement_router simply signals if the loop counter has reached the end of the list of verified entities. Once again, the operator.add annotation tells LangGraph to merge updates into the existing value of the state key using an add operation. For an int type, this just means “increment by the new value”.
Next up is replacement_reviewer_node. To review effectively, the agent needs to keep track of the reviewed transcript text. I noticed, after some trial and error, that making multiple replacement attempts for each verified entity boosted the accuracy of the replacement work. To achieve that, the agent needs to track the number of attempts it’s made for the entity it’s currently processing. All this means that AgentState gets two new properties:
And replacement_reviewer_node gets the following logic (it’s kind of a lot but not too bad):
Once again, easier than the length suggests 🙂. replacement_reviewer_node uses replacement_reviewer_llm to check if the current entity has been fully replaced in the updated text. It includes a guard that skips the review when both replacement_loop_idx and replacement_pass_count are 0, which means no replacement has even happened. If the LLM concludes that the replacement was successful, or if 2 replacement attempts have been made for the entity, replacement_loop_idx gets incremented to move the agent to the next entity on the next round of the loop, and replacement_pass_count is reset to 0 in preparation for that. replacement_reviewer_llm is configured to always return a boolean using the ReplacementReviewOutcome structure.
Okay, one more function to go. Almost there! 🤏🏾
replace_entity_node basically just needs to establish the current entity it should work on, feed that entity along with the transcript text into an LLM that will do the replacement, then update the agent’s state with the new transcript text. One more big block of code, I promise it’s the last one 🙏🏾. Here it is:
As described above, entity_replacer_llm does the replacement, with output structured using TextReplacement. This node also updates replacement_pass_count in the agent’s state, because this operation is the replacement attempt.
Whew! That was a lot 😅. With all of those changes done, it’s time to take the agent for a spin. Fresh, real transcript data will be tested in short order, but for now let’s stick to Chris Nolan’s affairs to validate all the new code. The logs of this run are even longer than the last set, so feel free to feast your eyes on them here. They show the value of updated_transcript_text in the final state object, along with other markers of the agent’s work. Ergo, success! 🙌🏾
Looking closely at the logs, some interesting things happened in this run. First, the reviewer LLM correctly flagged up that the “Kristoffer Nolen” entity had not yet been fully replaced after the first attempt, and the second attempt finished off the job. Exactly what we want to see 👏🏾. Secondly, the replacer LLM inserted TRANSCRIPT_TEXT: into the updated transcript more than once. Thankfully it had corrected itself by the end, but that kind of variability is not welcome here. Some strategies that can minimize this issue will be discussed further below.
But now… it’s time for… 🥁🥁🥁 real data!
The Results 📊
I built this agent as part of a tool to summarize videos from Fabrizio Romano’s YouTube channel. Yes, I’m a football transfer news junkie, don’t judge me. A typical video from that channel is this one, about 8 minutes long. The video’s transcript contains around 1500 words using around 8300 characters. Running the transcript through this agent yielded… a recursion limit error 😭. My fancy “agentic” loop wins the award for causing that. Small matter though, the error page offers a simple solution: specify a recursion_limit that’s as high as you need it to be when calling .invoke() or .stream(). If you’re thinking that maybe, just maybe, this is a sign of an architectural problem, your instincts are not wrong. I’ll touch on that in a bit. After increasing the recursion limit and getting a successful run of the agent, I could show you some more exciting logs, but I’ll highlight some not-so-in-depth metrics instead.
One interesting metric for the text replacement step is the number of incorrect replacements for each extracted entity. This number hovered between 0-2 for each entity, and it includes partial and accented replacements as described earlier. It also includes replacements of variations of misspellings for the same entity, for example replacing “Antract Frankfurt” with “Eintracht Frankfurt” even though the extracted name was already the correct canonical name. 2 incorrect replacements per entity is as bad as I am willing to accept for my use-case, so this result just about falls within my limits. Here’s a per-entity breakdown in the format “number of incorrect replacements / total number of occurrences to replace” for a run in which 16 entities were extracted:
“Benjamin Chesco” → “Benjamin Sesko” - 1/11
“Manchester United” → “Manchester United F.C.” - 1/12
“Newcastle” → “Newcastle United” - 0/8
“Red Bull Leipzig” → “RB Leipzig” - 1/7
“Nicholas Jackson” → “Nicolas Jackson” - 2/7
“Chelsea” → “Chelsea FC” - 0/4
“Darwin Nunes” → “Darwin Núñez” - 2/10
“Al Hilal” → “Al Hilal” - 0/7
“Liverpool” → “Liverpool FC” - 0/4
“Ritsu Doan” → “Ritsu Doan” - 2/3
“Eintracht Frankfurt” → “Eintracht Frankfurt” - 0/2
“Jack Grealish” → “Jack Grealish” - 0/9
“Everton” → “Everton Football Club” - 0/3
“Tottenham” → “Tottenham Hotspur” - 0/1
“Southampton” → “Southampton” - 0/1
“Malik Fofana” → “Malick Fofana” - 0/2
Another way to view those same numbers is to calculate “number of correct replacements / total number of occurrences to replace” expressed as a percentage, as a measure of accuracy of the text replacement step. For this same run, the average accuracy per-entity is 90.2%. That suggests, from a ridiculously small sample size 😂, that the agent can do the replacement quite well most of the time.
One more interesting number is the rate at which the review step correctly identified when the replacement was complete or incomplete. This number can be calculated as “number of correct reviews / total number of reviews performed” and expressed as a percentage, as a measure of accuracy of the review step. Across the full run the agent performed 19 reviews rather than the maximum 32 possible, because the reviewer LLM concluded that some entities did not require a second replacement attempt. 15 of those reviews were correct, meaning 78.9% accuracy. Meh, definitely room for improvement there.
And on that note, it’s time to talk about getting better results.
The Upgrades(?) 👨🏾🔧
General rule of thumb: optimize only after measuring, and start optimizing where the measured results are worst. Aaand right after saying that, I’m going to violate that rule just a bit 😇 because my objective here is to provide some food 🥘 for thought 🧠. So I’ll speak broadly about different optimizations I either considered or applied while building this agent for my video summarizer.
Better prompts
Improving the agent’s LLM prompts is perhaps an obvious change. In this blog post I used very simplistic prompts that were intended to (1) conserve space and (2) maintain focus on what the system should be doing rather than how well it does its job. For my tool I used much more descriptive prompts that included a number of examples for how I wanted the LLMs to respond. If you’re wondering how to get highly descriptive prompts with appropriate examples and formatting, start by using ChatGPT or your fave chatbot to do the heavy lifting after describing your needs. As an example, here’s the final prompt I used for the text replacement step. Apart from “normal” prompting, RAG is a more advanced technique to inject domain-specific context into prompts, and the idea of “context engineering” is a more wholistic way to think of this process.
Model choice
Testing different models is another way to eek out better performance. Each model has a unique profile for cost and suitability to a given task, so there’s no substitute for trying out different models to see what works best for your use-case. For example, in the verifier step I was keen to use gpt-5-nano because of its low cost compared to other high-end OpenAI models, but I found that it performed noticeably worse compared to gpt-4o-mini. Similarly, I would’ve used OpenAI’s best available reasoning models for the review step but they were too expensive for this use-case. Lesser models and other optimizations could get me my desired results.
Reduce LLM workload
Steps 1 and 3 of this agent are variants of “needle in a haystack” challenges where the LLM has to find some data in a sea of text. One can generally assume that the smaller the haystack, the easier the LLM will find the needles. To this end, the next 5 subsections discuss different ways to reduce the amount of work sent to the LLM.
Summarizing/shortening input
You may have noticed that the final prompt I provided earlier specifies that a video summary will be one of the inputs to the LLM, not the full transcript text. That’s because my tool summarizes the transcript first, then passes the summary into the agent for enrichment. That step alone cut down around 60-70% of the transcript text sent to the agent, making the process faster, cheaper, and more accurate. Of course there’s a risk of losing some context relevant to some entities, but ultimately the outcomes balanced out pretty nicely for my needs.
Chunking
When dealing with large inputs it often makes sense to work with chunks of input at a time instead of all the inputs at once. However, the videos I worked with were short enough to not need chunking for better performance. So I didn’t need to pursue this strategy.
Deterministic + fuzzy search and replace
A combination of deterministic and fuzzy searching could be a viable strategy to identify the bits of text that need to be replaced in Step 3. Depending on how well it works, this strategy could augment if not replace the modified “find and replace” strategy used by DemoEnrichmentAgent. I didn’t pursue this path seriously because, frankly, I was more interested in learning how to build an agentic workflow than in making each step the best it could possibly be. My gut feeling is that deterministic + fuzzy search and replace would still not have been enough, but that remains to be seen.
One-shot replacement
This means replacing all the entities in one attempt, rather than using the replace-review loop that caused the recursion error. Once again, the final prompt I provided earlier shows that one-shot replacement is actually the strategy I use in my tool, not the replace-review loop. But why, you may ask? Well, with a small enough amount of text and with relatively few entities to replace, that step can be done by an LLM in one go. It comes with a slight dip in accuracy, but I was willing to accept it because of the time and cost savings. Choosing to summarize the transcript before feeding it into the agent made this a viable alternative to the replace-review loop.
Caching
Saving and reusing any outputs that the agent repeatedly generates can bring some welcome benefits. For example, the canonical names are good candidates for caching because they’re unlikely to change for a given input. With a store of such data, the agent’s logic can be modified to first check the cache and use results from there if available, rather than going to the web or relying on an LLM every time. However, caching is notoriously hard to get right if you’re not careful. For this agent, I decided not to implement caching because the potential time and cost savings were not large enough to risk my debugging sanity 🙂.
Conclusion 😌
If you made it this far, you have my sincere gratitude 🙇🏾♂️. You deserve a gift…

The complete code shown in this post is available on GitHub.
Now go forth and build your own agents! And let me know about them too 😉.
Questions? Feedback? Nice words, or mean ones? Feel free to reach out to @CodeWithOz on all the socials, or on LinkedIn.